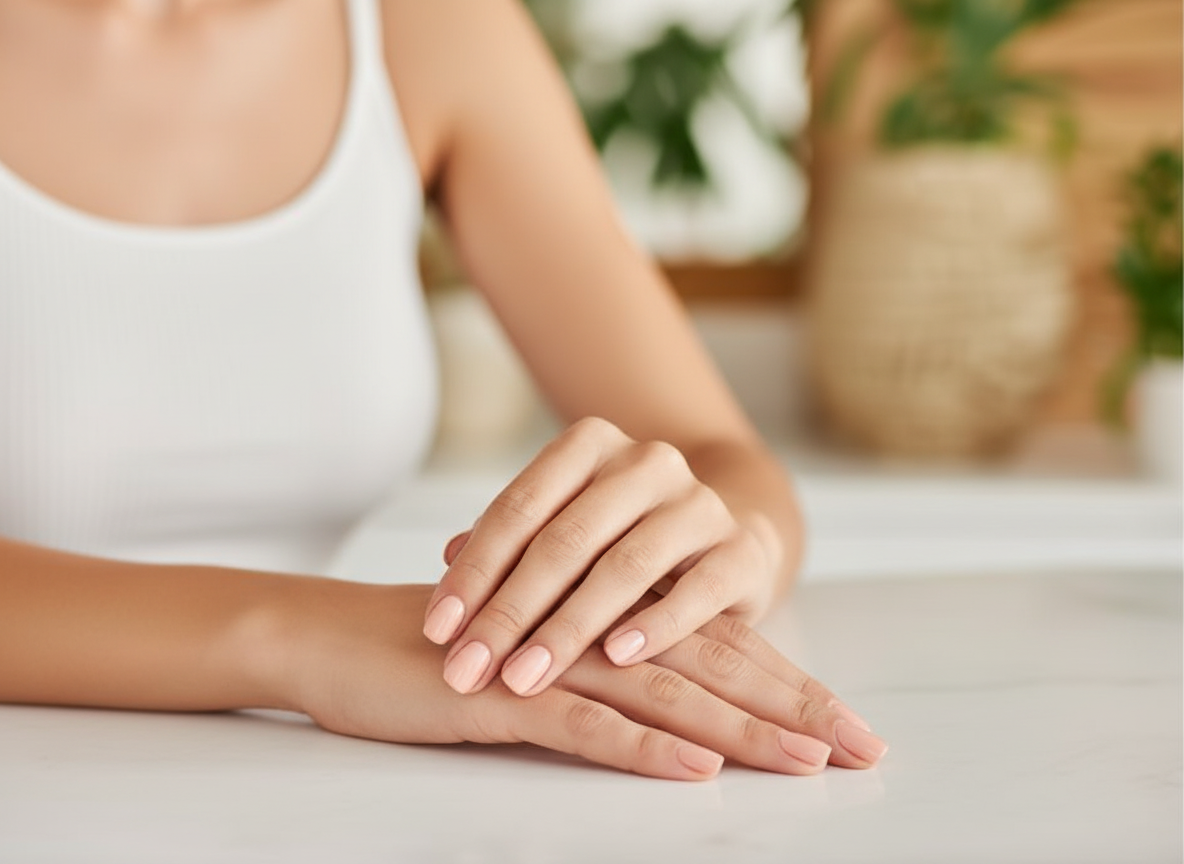
Press-on nails have quickly become one of the easiest ways to achieve a beautiful manicure without spending hours at the salon. They are affordable, convenient, and come in so many stylish designs that it’s almost impossible not to find something you love.
But let’s be honest…
As good as press-on nails can look, there’s still one major problem many people struggle with making them look natural.
You might have tried press-on nails before and felt like something was just off. Maybe they looked too thick, didn’t sit properly on your nails, or started lifting after just a short time. Sometimes, the edges don’t blend well, or the nails look too perfect in a way that feels obviously fake.
And instead of giving you that clean, polished look you were going for, they end up doing the opposite.
The truth is, press-on nails only look fake when the small details are ignored.
It’s not about the nails themselves it’s about how you prepare your natural nails, how you apply them, and how you finish the overall look. When done correctly, press-on nails can look just as flawless as a professional salon manicure, and in some cases, even better.
In this guide, you’ll learn exactly how to make press-on nails look natural and not fake without dealing with lifting, gaps, or a bulky finish. From proper nail prep to shaping, application techniques, and styling tips, everything you need to get that clean, seamless look is right here.
By the time you’re done reading, you won’t just be applying press-on nails,You’ll be mastering
Why Press-On Nails Sometimes Look Fake
Before fixing the problem, you need to understand why it happens.
Most press-on nails look unnatural because of small mistakes that are easy to overlook.
Common reasons include:
- Choosing the wrong nail size
- Poor nail preparation
- Applying too much glue
- Thick or unfiled nail edges
- Designs that don’t suit your nail length
When these things add up, the result looks bulky and unrealistic.
But once you fix these details, everything changes.
Step 1: Start with Proper Nail Preparation
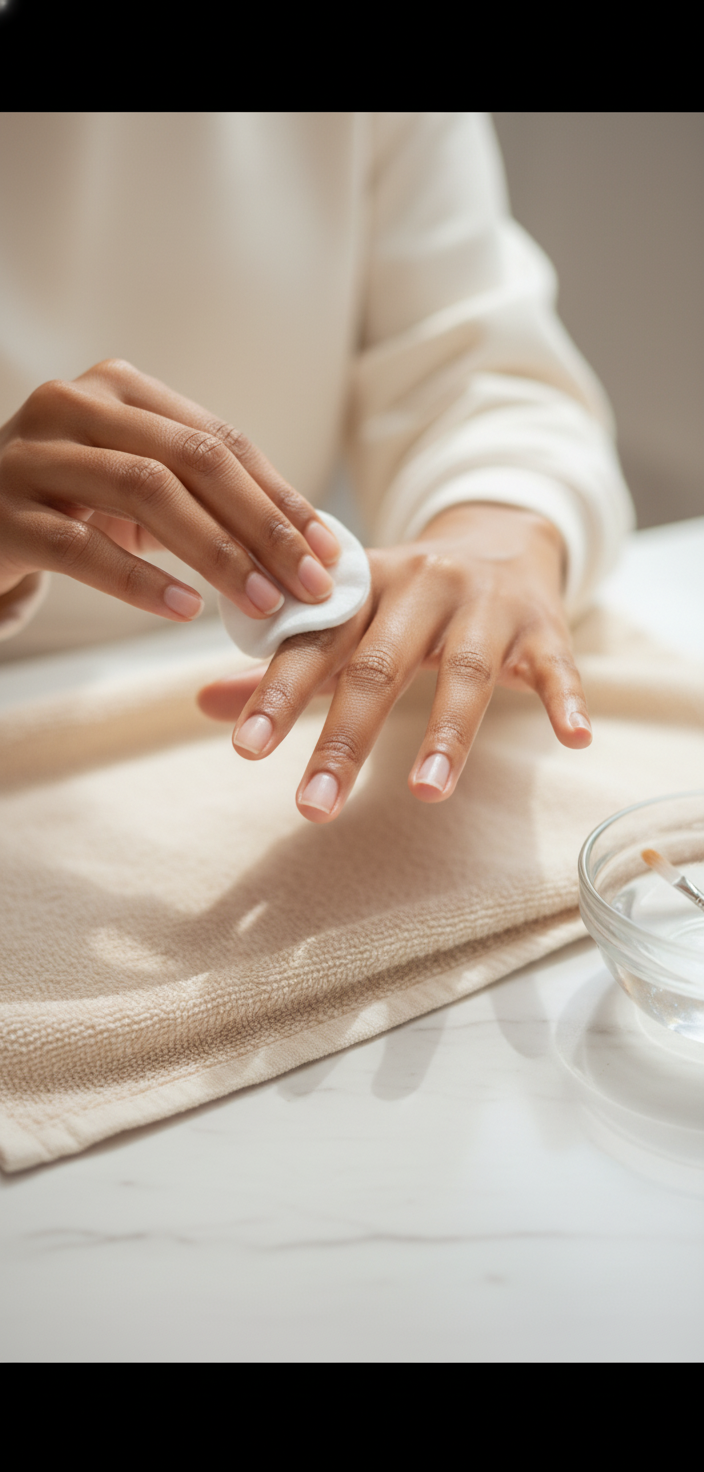
This is the most important step, and the one most people rush.
If your natural nails are not properly prepped, your press-ons will never sit flat or look seamless.
What to do:
- Clean your nails thoroughly
- Remove old polish
- Push back your cuticles gently
- Lightly buff the surface of your nails
Buffing removes shine and helps the press-on stick better, which prevents lifting and gaps.
Skipping this step is one of the main reasons press-on nails look fake.
Step 2: Choose the Right Nail Size for Each Finger

This step alone can make or break your final look.
Press-on nails should fit your nail bed perfectly. Not too big. Not too small.
If the nail is too big:
It will sit on your skin and look bulky.
If the nail is too small:
It leaves gaps that make it obvious you’re wearing press-ons.
What to do:
- Match each nail carefully
- If unsure, choose a slightly bigger size and file it down
A perfect fit = a natural look.
Step 3: Shape and Customize the Nails
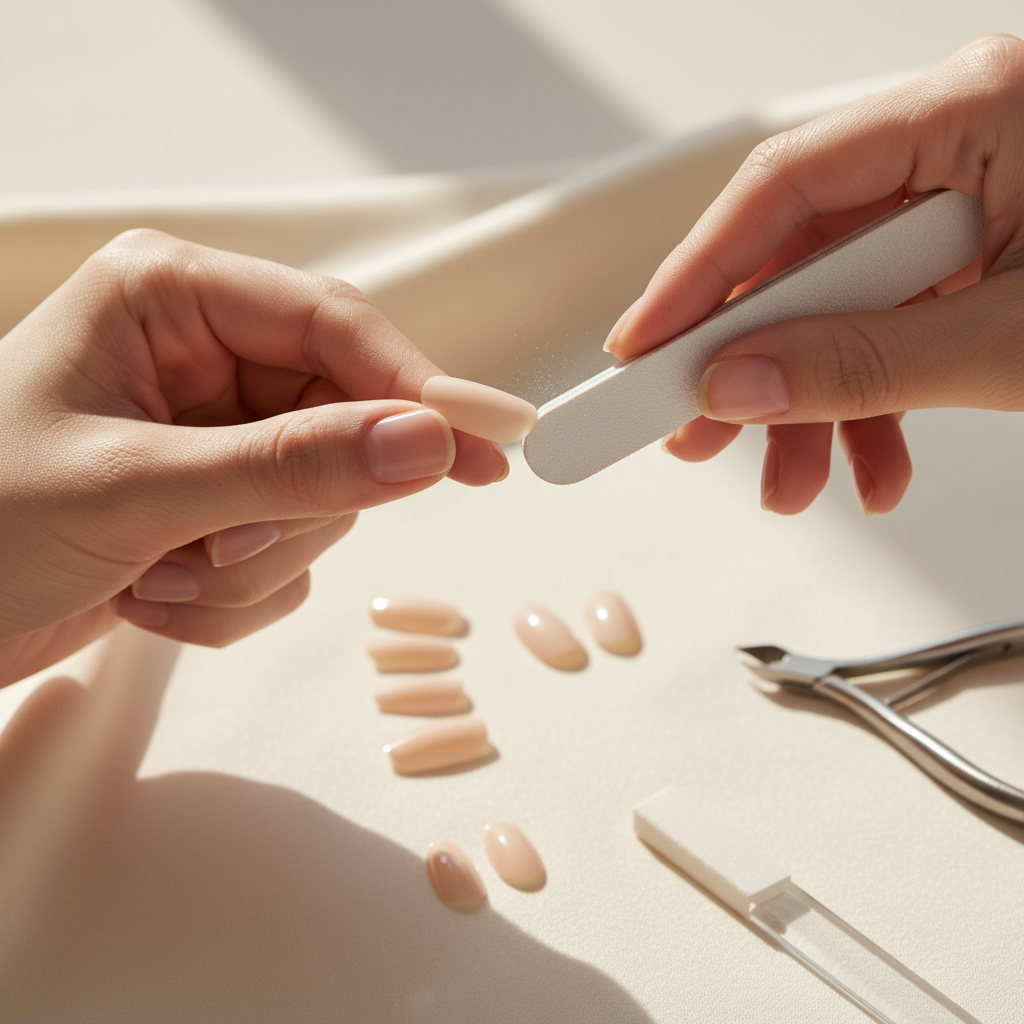
Most press-on nails come in standard shapes, but customizing them makes them look more realistic.
You can:
- File the sides for a better fit
- Adjust the length to suit your fingers
- Smooth out the tip for a softer finish
Shorter or medium-length nails often look more natural than extremely long ones.
If you love soft looks, you can explore styles like your “simple pastel nails” or spring nail designs to keep things minimal and realistic.
Step 4: Apply the Right Amount of Glue
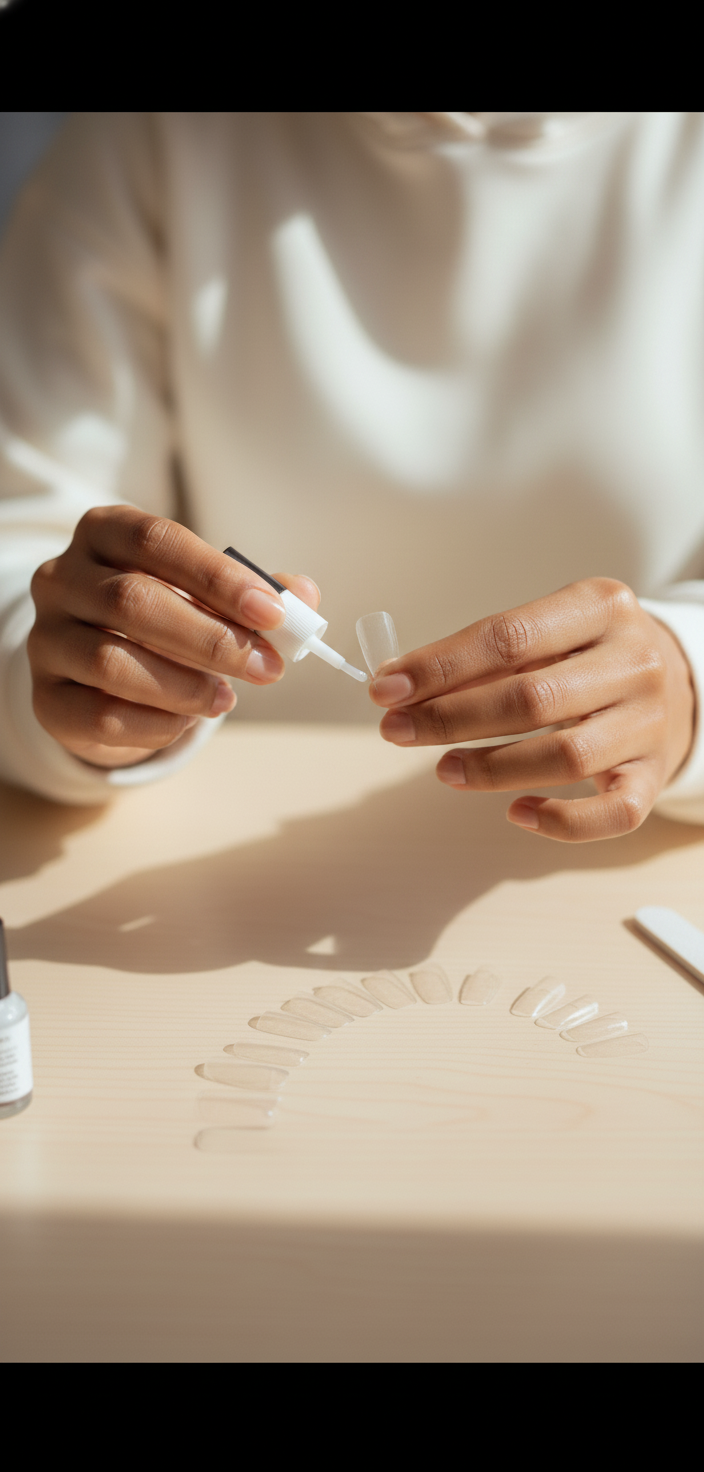
Too much glue is one of the biggest mistakes.
It causes:
- Messy overflow
- Thick-looking nails
- Air bubbles
Too little glue, on the other hand, leads to lifting.
The right way:
- Apply a thin, even layer
- Press the nail down firmly
- Hold for 20–30 seconds
This creates a smooth, seamless bond.
Step 5: Position the Nail Correctly
Placement is everything.
If you place the nail too high or too low, it won’t look natural.
Correct method:
- Align the press-on close to your cuticle
- Press from the base and move forward
- Avoid leaving a gap near the cuticle
This gives that “grown from your nail” effect.
Step 6: Blend the Edges for a Seamless Finish
This is the secret most people don’t know.
After applying your nails, take a file and gently blend the base where the press-on meets your natural nail.
This removes any visible line and makes the nail look more natural.
Step 7: Choose Designs That Look Natural
Not all nail designs look realistic.
For a natural finish, go for:
- Nude tones
- Soft pinks
- Minimal designs
- Glossy finishes
You can get inspiration from your spring nail designs or even your April nail ideas to choose styles that feel soft and wearable.Check out this April nail design you’ll love READ MORE
Step 8: Add a Top Coat for a Salon Finish
A top coat instantly upgrades your nails.
It: Adds shine Smooths out imperfection , Makes the nails look more professional
Even if your press-ons are matte, a glossy top coat can give that fresh salon look.
Step 9: Take Care of Your Nails After Application
How you treat your nails after application also affects how natural they look.
Avoid:
- Using your nails as tools
- Excessive water exposure
- Rough handling
Well-maintained nails always look better.
Styling Your Press-On Nails for a Natural Look
To make your nails look even better, match them with your overall style.
Think about:
Your outfit, Your accessoriesYour overall aesthetic For example, pairing your nails with clean outfits for spring styling posts helps everything feel cohesive and polished.Check out this spring jeans styling ideas you’ll love
Common Mistakes to Avoid
Even small mistakes can completely change how your press-on nails turn out. What should look clean and natural can quickly start looking bulky, uneven, or obviously fake if the basics are ignored.
One of the biggest mistakes is skipping nail prep. When your natural nails are not cleaned, buffed, or properly prepared, the press-ons cannot sit flat, which leads to lifting and gaps.
Another common issue is choosing the wrong sizes. If the nails are too big, they sit on the skin and look unnatural. If they are too small, they leave visible gaps that instantly reveal they are press-ons.
Many people also make the mistake of overusing glue, thinking more glue means stronger hold. Instead, it creates mess, thickness, and uneven application.
Ignoring proper shaping is another problem. Even good-quality nails can look fake if the edges are too sharp, too long, or not adjusted to fit your hands properly.
Lastly, overly bold or complicated designs can sometimes make press-ons more obvious, especially if the goal is a natural look. Simple, clean designs usually blend better with your real nails.
Avoiding these mistakes makes a huge difference in how natural and seamless your press-ons will look.
To avoid those mistakes Check out this 10 healthy nail are tips you’ll love READ MORE
Extra Tips to Make Press-On Nails Look Expensive
Looking expensive is all about refinement and subtle detail. Press-on nails can look salon-quality when you focus on the little things that most people overlook.
- Keep your cuticles moisturized: Healthy cuticles instantly make your nails look cleaner and more maintained. Dry skin around the nails can make even perfect press-ons look unpolished.
- Choose high-quality press-ons: Thin, flexible, and well-shaped nails blend better with your natural nail bed and give a more realistic finish compared to thick or stiff sets.
- Stick to clean color palettes: Soft nude tones, milky whites, blush pinks, and neutral shades always create a more elegant and timeless look than overly bright or busy designs.
- Maintain your nails regularly: Small maintenance habits like checking for lifting, smoothing edges, and applying a fresh top coat help your nails stay fresh and intentional for longer.
At the end of the day, simplicity and consistency are what make press-on nails look expensive.
At the end of the day, making press-on nails look natural is not about spending more money or constantly chasing new designs, it is about paying attention to the small, intentional details that bring everything together.
From how you prepare your natural nails, to how carefully you choose your sizes, and how you apply and finish them, every step contributes to the final result. When even one step is rushed or ignored, it becomes noticeable. But when everything is done with care, the result looks seamless and polished.
When applied correctly, press-on nails can look just as beautiful, clean, and refined as a professional salon manicure. In fact, most people will not even be able to tell that they are press-ons. That is the power of proper technique and attention to detail.
The goal is not perfection, it is effortless beauty. The kind of beauty that looks natural, soft, and well put together without appearing forced.
Start simple. Choose designs that suit your personal style. Take your time with each step instead of rushing through the process. And most importantly, allow yourself to enjoy the process rather than treating it like a quick fix.
Because when your nails look natural and well done, it quietly elevates your entire appearance. It adds that subtle finishing touch that makes your overall look feel more intentional, more polished, and more confident.
Leave a Reply